Showing posts with label Various desserts. Show all posts

Wednesday, January 18, 2012

Choux with red fruits and pistachio creme

In the past years I've created a lot of cupcakes who can`t seem to find their place in one of my posts.. There is always something more new, more current in the moment I am deciding on writing a post ..

Well it's time to get back in history, pull out all the photos, and almost left out recipes that I certainly do not want to ignore, let alone forget ..

Photobucket

First in line is definitely a dessert that you may know from my posts about Paris .
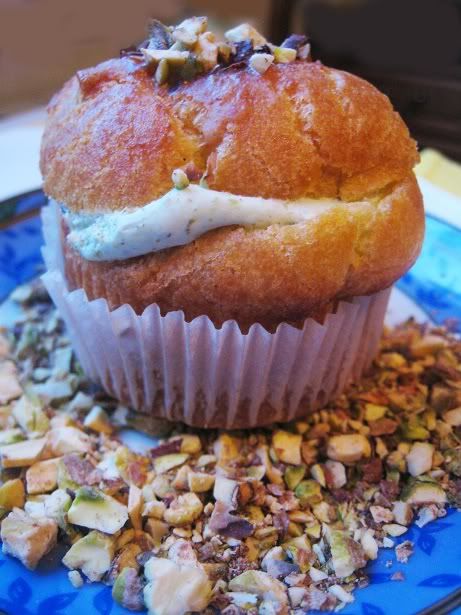
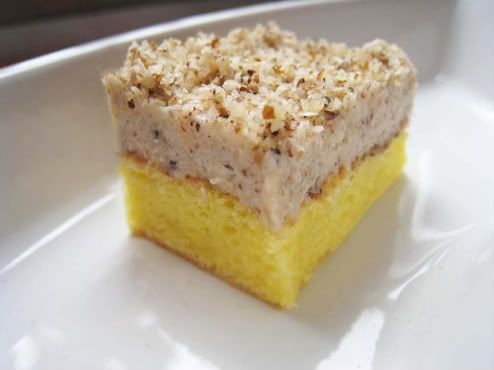
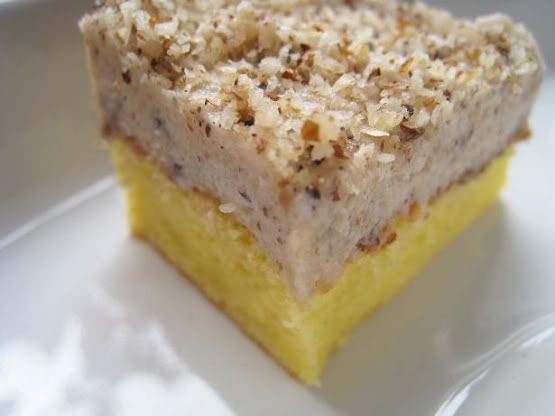
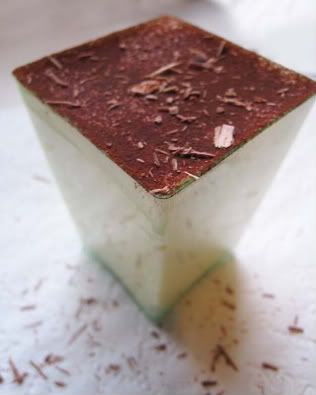
Yes, a replica of Paris Choux attempt resulted in my favorite "cupcake" I made in the year 2011. And it would be shameful not to share with you. I admit, it is not the simplest recipe out there .. but definitely worth every minute invested!


The dough for choux
 (taken from the book-Millefeuilles-sucres, Sales & Maison-Catherine Kluger)

140g flour
4 eggs
125ml milk
125ml water
110g butter
5g sugar
5g salt

 Red fruits jam

400g berries (raspberries, strawberries, blackberries ..)
1 tablespoon gelatin (for jam)
sugar (if desired, 1-2 tablespoons, not too sweet!)

Pistachio paste

250-300 g cleaned pistachios
250 g of sugar
70 ml of water
few drops of almond extract

Pistachio Chantilly

200 ml whipping cream
100 g mascarpone cheese
50-70 g  pistachio paste
30 g sugar

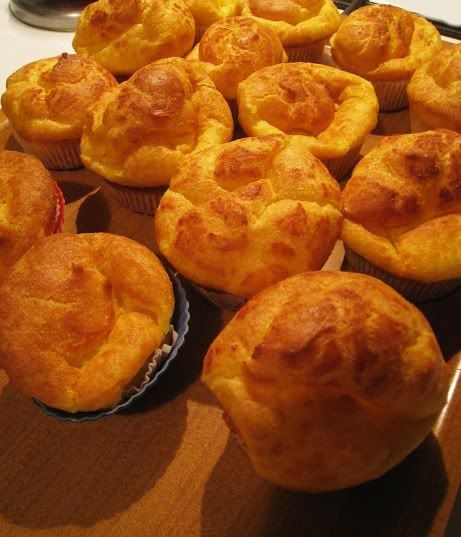
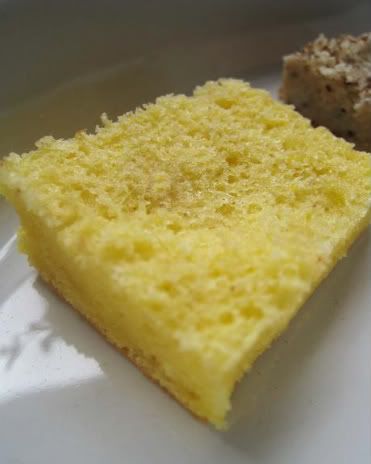
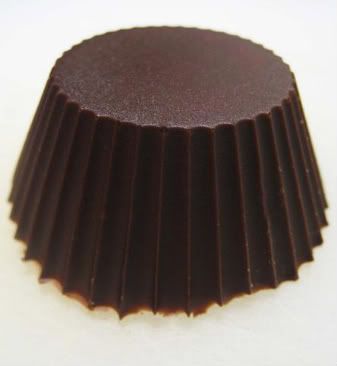
So lets begin with choux pastry for profiteroles / éclairs / creme puffs.

Photobucket
  • In the cooking pot boil together milk, water, butter, sugar and salt, until it boils. Remove from heat and stir in flour with a whisk. Return the pan to the fire and cook stirring vigorously until the mixture dries out and a film forms on the bottom of the pan. Take the dough off the heat and let 1-2min to rest.
  • Stir the eggs, one by one, into the warm mixture with a spatula. The goal is to minimize entering the air in the batter, so avoid mixing or whisking.
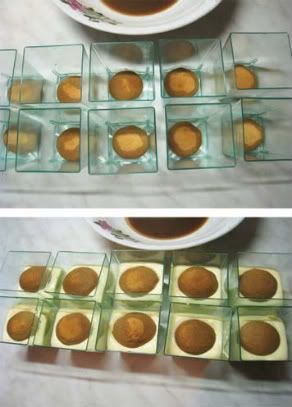
  • With this mixture fill the muffin molds (fill 2/3 of the mold).
  • Bake them in the preheated oven at 170 ° C for 20min.

Red berries jam
Photobucket
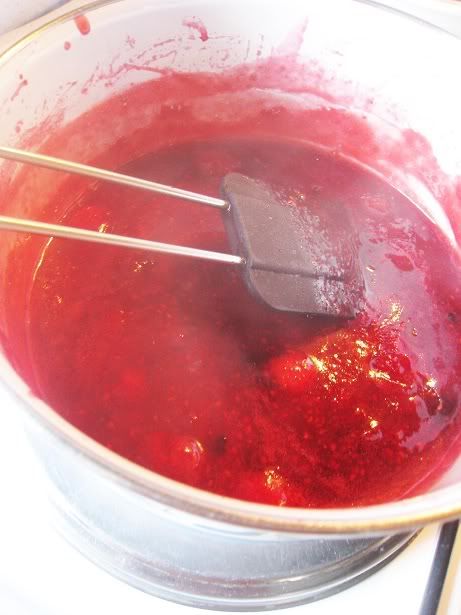
  • In the cooking pan cook fruit till it starts breaking to pieces. Add the sugar and gelatin and cook until it reaches the desired density/thickness. 
  • Be aware that the jam itself will thicken a bit when it cools down.

Pistachio paste
 
Photobucket
  • Clean the pistachios and blend them in a food processor There will still remain some bits but it should look like a compact paste.
  • Heat the sugar and water into a sugar syrup. As soon as the syrup begins to thicken, and before the color changes from white to brownish, pour it over the paste of pistachios. Add almond extract and stir well. 
  • Before using the paste, soften it with a spoon.
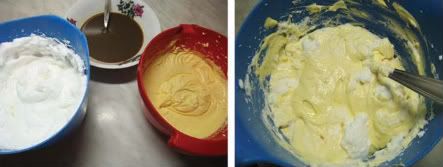
Pistachio Chantilly
  • Whip the whipped cream. Add in the mascarpone, the paste of pistachios and sugar. Mix well together.

Filling the Choux
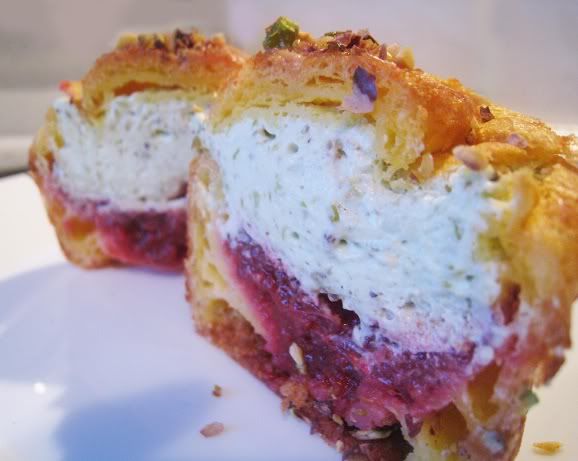
  • Cut the tops of the choux (and the surprise awaits inside-lots and lots of empty space! :)
  • Begin to fill it by putting in a spoonful of jam and top it with the pistachio chantilly so high that the cap of the choux sticks onto it.
Photobucket


Yes, the filling is the simplest and quickest step of the whole process. In fact, no .. wrong .. The simplest step is one that follows, which is melting it in your mouth!
Amazingly light foamy creme, sweet and salty flavors of pistachio, a big hit with the sour red fruit jam. And the Choux recipe that uses milk + water instead of water only is my new discovery and pride.
Have a fun weekend with this dessert .. You will return to it often!


Photobucket

Friday, January 13, 2012

Chocolate fudge brownies (with raspberries) for PMS

PhotobucketEach of my recipes is usually accompanied by my detailed explanations on how and why the text was created ..

This time the reasons are self-explanatory .. without shame, I admit .. PMS .. in those freaking days I need something fulfilling, chocolatey, sweet, moist..

Brownies.

Fudge Brownies.

Hot fudge brownies with raspberries and ice cream made ​​from wild fruit.

Monday, March 14, 2011

Anatomy of cupcakes (or how the 7th heaven became a revelation)

 I am wondering again on all these colorful blogs, getting inspiration from all sides. But I decided to use this post to tell a bit more about cupcakes, where they came from and all the basic information that some of you may not know.

What brought me to this topic is a dessert we had on this Sunday lunch- 7th heaven- a cake made of simple vanilla cake layer, topped with creme with walnuts. My grandma used to make this cake often and to me, it was just one of the simplest cakes, nothing that lingered in my mind.. Until I started seriously baking and thinking about cakes in a whole new light.

On contrary to what others may believe (including me), my grandmas old cakes are not really much different from todays cakes. People often look and search for new and better recipes, always in a search for something bigger, better... when in fact the only thing we need is to get back to our roots.. and you can hardly find a better recipe than the old cake and creme recipe from your grandma.


Photobucket
 When I first discovered buttercream, I was out of my mind.. I tried searching for the ideal recipe for it, so that its taste would not feel too buttery, nor too sweet or inedibly too fat. I have found so many buttercream recipes, tried them, scratched them over.. all so that I would find  the absolutely perfect one just this Sunday, eating by the possibly hundredth time in my life- my grandmas 7th Heaven. The best buttercream I have ever tasted! My grandma knew about and made buttercream for years, and than I selfishly thought that it was ME who brought it in the family as a new thing. NOT!


Photobucket

At the same time, I have tested and tried so many vanilla cake recipes, to find "THE" recipe for cupcakes.. I seriously believed that the Magnolia bakery recipe was the one, and there couldnt be anything better than that..
But, this weekend I also discovered that Magnolia could learn a whole lot from the cookbooks of my grandma.. Because the cake from the traditional, old recipe for the already mentioned 7th Heaven put the Magnolia recipe to the knees.. beat them by miles!

Photobucket

And so, by learning the new, we often come to the old.. The same way the 60s, 70s, 80s fashion keeps coming back, the recipes also slowly return to their originals, tradition and roots. I say "recipes", because the external appearance of cake will never get back to its old self.. that one continues on with the trends. Therefore, I am so excited to test the 7th Heaven in the new- cupcake form! My grandma would surely be happy to see them in those new, modernized forms.

So, as I said- in with the old, but out with the new.. Cupcakes are actually nothing but a traditional grandmas cake on the inside, but than on the outside- they are a new, modern and cute petite, originally decorated desserts. So, there it is- the whole anatomy of cupcakes (the photo from the blog Things) :


Photobucket


Photobucket

Wednesday, March 2, 2011

Chocolate peanut butter cups

Yup, that is so typical me.. When I am busy, I function great.. As soon as I slow down- I fall sick! And so I am now lying in my bed, with a cup of tea and a laptop.. and in lack of (active) activities, here I am with the new post.


The last weekend has been interesting and active. I had two orders from two friends.. but about that some other time. After finishing those orders, I decided to treat myself with something. And immediately after thinking about it, I had yet another wonderful, fun and jolly package arriving to my address.. this time from the USA.

Photobucket
A box of approximately 1kg full of- CANDY!! Tootsie rolls, Jolly Ranchers, Smarties, Peanut butter M&Ms, Reese`s peanut butter cups.. So many of them which were on my "to try" list, but since now I had no way of reaching them. And out of them all, Reese`s PB cups on the top of my list..
I adore Peanut butter and have been wanting to try and make it on my own for a long time now. I suddenly remembered a "funny" post I recently read on  a blog I follow , which seemed a bit on the crazier side. A husband and wife were talking about peanut butter cups they had gotten as a Christmas gift to their DOGS! .. because they allegedly love peanut butter.. (which was followed with about 20 photos of their dogs eating them).

Okay, lets erase this photo out of our heads for right now and return to the right direction.
Reese's PBC were the first on my list to try, out of the whole package.. but there were only 4 of them in there.. (and one went to my my friend for testing.. so that is already 3)
1. one- I ate immediately, automatically, with-the-speed-of-light right away
2. one- I left for the day when I decide to create a remake of it (for testing)
3. one - got a museum status- Look, but do not touch!


Photobucket

But yesterday, I have finally decided to create this delicious sweet bite. And my conclusion stands- the fourth museum status piece is totally replaceable with the homemade thing!


In case you are willing to spend a few hours over these sweets, just follow these instructions and enjoy. The only thing that can come out of it is you surprising yourself with how good of a cook you are. :) And you might surprise the rest around you as well. I became surprised too, when I opened up my freshly built cups and have seen this.. (ahh, peanut-butter love)

Photobucket

 So the ingredients for the filling- the peanut butter are:
Peanuts (salty, pre-roasted) (two handfuls)
Caster sugar (1 Tbs)
Butter (1 Tbs)
Petit beurre cookies (3-4 cookies)

Photobucket

 Wipe your peanuts off from excessive salt and blend them together with the rest of the ingredients (I use the stick blender). Dont worry about not getting the smooth consistency. In fact, the rough, lumpy one, with the remaining tiny pieces of cookies will be far more interesting and tastier to eat inside of the smooth chocolate.
When the ingredients are well blended together, form a sausage-like line out of it on the plastic foil and roll it in. Put the "sausage" in the freezer for about half an hour to harden, because that will make it easier to handle afterwards.

Photobucket

 For the next step, you will need about 300g chocolate (for cooking, milk, dark.. doesnt matter, as long as it has no filling in it), a paintbrush and cups for mini cupcakes. I used the silicone cups, but you can just as well use the paper cases (but in that case, put 2-3 together, to make them harder and more stable).

Melt the chocolate with the tempering technique and use it to cover the mini cupcake cases/molds (from the inside). I used 20 mini cupcake silicone cups, but if you are using smaller ones, you will nee at least 30.  Let the chocolate harden and repeat the procedure until you get about 1,5- 2mm thickness of the chocolate layer.

Photobucket

You can put the chocolate cups in the freezer for 15min to harden, and than take them out, just as well as the peanut butter "sausage". Fill the cups with scoops or slices of the sausage.

Photobucket

...and than cover each of the cups with molten chocolate (not hot), all the way to the top. Return the filled cups in the freezer for an additional 15min to chill. 

Photobucket

And that is all folks! Reese`s PB cups cannot even compare to the homemade fresh pralines filled with delicious PB filling. In the case you wish to give them out as a gift to your friends (or someone special), just wrap them up in the pieces of aluminium foil.

Photobucket

 And could there ever be anyone who doesnt like a homemade chocolatey gift? Now honestly??
Photobucket

Sunday, February 20, 2011

Chocolate brownies

A few posts ago, I declared my not too big of a love towards chocolate.. And after a few completely non-chocolatey posts that followed, which totally confirmed it, its finally time to step on my toes. Because what is a person who cannot be convinced into anything.. or in this case- convinced into trying a full-on chocolate recipe..

I admit, up till about 5-6 years ago, I didn't even know about cupcakes, brownies, tarts, cake pops and hundreds of other terms you can now find daily in my vocabulary. Time is really precious for those who love to learn new things and refresh their memory. But by learning new things, you always run into some things valuable holding on to.. something like those old grandma's recipes which represent so much more than just a list of ingredients.

Photobucket

Brownies could be described as a cake which is by its consistency somewhere between a cake and an cookie. It has a density of a cookie, but at the same time moistness of a cake. The first time I ever heard of brownies was when my friend returned from her trip to the USA and kept repeating how she adores them and misses them. My curiosity immediately switched into the "search" mode and started looking for recipes online. I have tried about 3 which came out decent, but not nearly good enough to receive a spot on this blog.
And there comes my recently mentioned topic about my hobby- penpalling, because my up-till-today unquestionably favorite brownies recipe came from my penpal.
Bo from California sent me the recipe of her favorite brownies, the one that she got from nanny, as a memory on her.

Photobucket

It felt amazing receiving something so special from someone. A recipe that means more than just a list of ingredients to someone. A recipe I would swear on. Me, with the chocolate aversion, going crazy about a chocolate heaven!! Why? Because the cake is so rich, dense and moist, and the creme covering it so untypical- with honey. Exactly those two- rich cake and honey in the creme are the "it" factor.


But emotions aside.. This cake disappears within hours in my family.. so fast that the same issue arises every time.. taking a photo of the cake!! The first photo from this post is two years old. And the last evenings final product.. well, lets say this is a symbolic memory of it:


Photobucket

Oh yea, almost forgot-  THE RECIPE! (just click on the link, I previously published this recipe on the Coolinarika) 

(Does it seem as if  I am recently publishing only comfort food here?) :)

Photobucket

Monday, January 31, 2011

Tiramisù

Tira mi sù.. or translated from the Italian- pick me up.. Yup, thats what we are talking about today.. 

Photobucket

Most people swear on chocolate to be their pick-me-up of good mood.. My (un)lucky self never found that much pleasure in plain chocolate, therefore I was destined to find different, more creative ways to make a cranky day into a good one.. or at least fool myself for enough time into it so it would pass as quickly as possible.. Of course, there`s those who are cranky every day and, no matter what they get, they can never find enough pleasure in it. But for those people, not even my "Tira mi sù" would ever help.
So  this recipe is in fact for all you girls (and boys) in PMS, and with absolutely no patience to spend an hour fixing up and baking a chocolate cake just so you could eat its heart out in about 15min time. Coz when we are talking about bad mood- nobody feels like waiting..

So before we get to the recipe.. let me admit what is the secret reason for me making this right now.. (apart from the pick-me-up part)
All those who have read (and tried) the last posted recipe, must have about 400g mascarpone sitting at the fridge, waiting for the next opportunity to arise for using it. As this ingredient goes bad very quickly, this is one of the best ways to use it up .. I think..

Tiramisù
4 eggs
4 tbs sugar
400g mascarpone cheese
lady fingers
a cup of coffee (or nescafe) with a bit of rum (or other yummie liquer)


YES! It`s that simple! Who would ever guess? And another hint- I assume you noticed the number 4 repeating itself in the recipe. That would also mean this recipe is so simple to adjust to your needs. Say you have just 300g mascarpone... you just put 3 eggs, 3tbs sugar.. and you are ready to go..

The how and what section starts now. To make it easier on you, i am posting instructions along with photos!

So, lets start by separating the eggs. In the first (red) bowl put the yolks, and in the second (blue) bowl put the egg whites.
Add sugar into the yolks and start mixing.. for about 5-7 minutes (till the hand aches.. except if you are the owners of a  KitchenAid, you lucky people ).
When the yolks and sugar turn into a tick "pasta" texture, add in mascarpone and mix on the slowest speed, just till the mixture is even.
Wash and dry well the mixer wires and than get to mixing the egg whites till they form firm, stiff peaks and the mixture holds well together. 
So than, you should have two bowls like these in front of you.

Photobucket

 Add the egg whites in the egg & mascarpone mixture, fold it in slowly and gently (never by a mixer!). The final mixture should be a beautifully, lightly fluffy yellow cloud of perfection (and that's just the way it tastes).

Apart from this mixture, you will also need coffee+rum mix in which we will drown the ladyfingers. Make coffee as strong as you wish, but don't fear its taste, even if you don't usually drink it (just like me). The stronger coffee+rum taste is there for reason, and works just perfectly with the sweet fluffy cloud we will eat it with. Without this combination, this dessert would be plain and too sweet. I am sure you dont want that!


And so finally, we are ready to create our cake. I know you are all so used to the classical form of  Ladyfingers  but look out for new forms that may make this creation easier. I found these round shaped ladyfingers in Lidl, identical by taste, but so much simpler for me.

So, the process of arranging works like this- you drown the ladyfingers into the coffee+rum mixture, just for about 5sec. You put the cookie on the bottom of the cup you are using. Than you spread a spoonfull of egg+mascarpone cream over it. And we continue with the cookie and cream process all the way till the top of the cup. We end with the layer of cream which we straighten with a sharp knife.


Photobucket
Photobucket

The final touch of the cake is sifted (unsweetened) cocoa powder on the top. Its easiest to spread it with a little sifter which will break all the possible lumps that would have otherwise ended up on top of our cake.

Photobucket

And thats all folks.. After this,  a cake should sit in the fridge for about an hour.. That is, if it survives.. But hey, who will ever know.. It will do its purpose with or without the fridge, right? 

Photobucket
Another tiny deail.. This is the original italian recipe for the tiramisù in which you do not put whipping cream or other similar ingredients to make it stiff and possible to cut. This cake is not meant to be cut or served in a form of a rock solid block, but only for eating out of a cup it has been prepared in.

For all you in a need of a (legal and) quick pick-me-up, i wish you a lot of good will, happiness and optimism. And may there be as less as possible of those who cannot be picked up not even with this dessert.

Photobucket